Author Topic: HID Upgrade to Xciting 500  (Read 1177 times)

RURC

  • Jr. Member
  • **
  • Posts: 53
    • View Profile
HID Upgrade to Xciting 500
« on: April 18, 2017, 04:00:24 PM »
Hello all. what I have here is a 45 minute upgrade that I feel anyone can do. This is simple and direct. If you can run a screwdriver you can do this with half your brain tied behind your back.

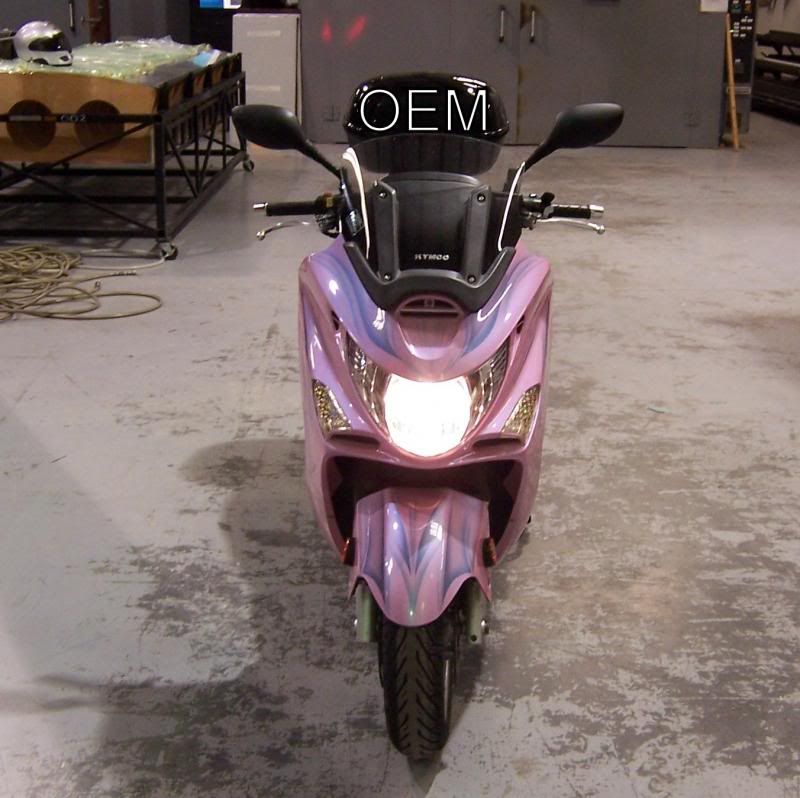
Here is the scooter with the OEM headlamp bulb installed.


First thing you have to do is locate all the screws that hold on the front faring of your bike. To make this easier I have photos of their locations. Please remove the front one last and install it first when going back together. Line up all the guides properly when going back together.
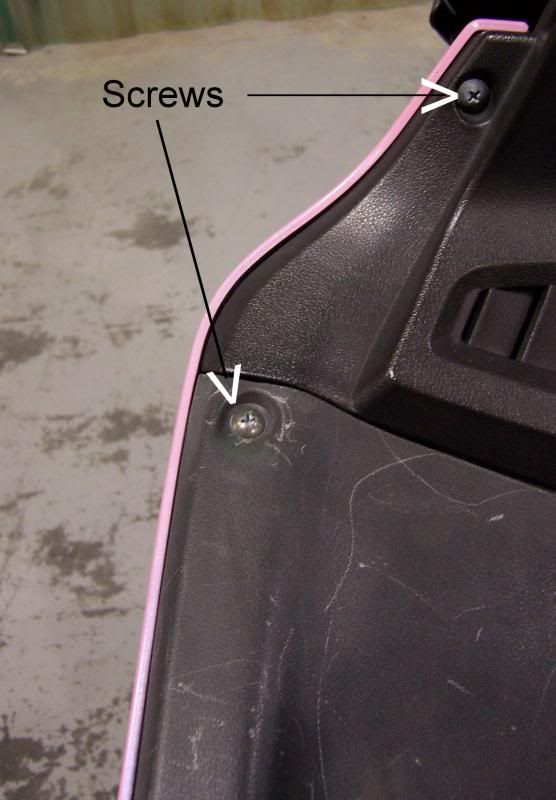
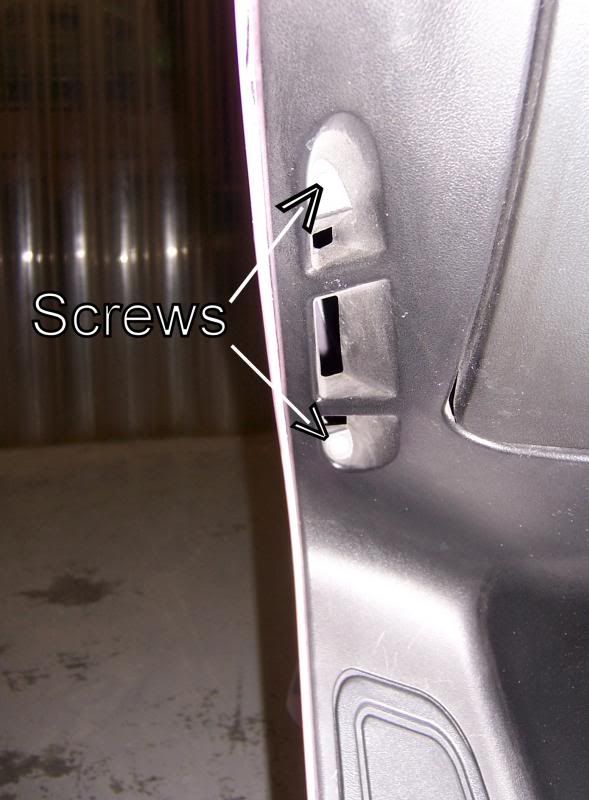
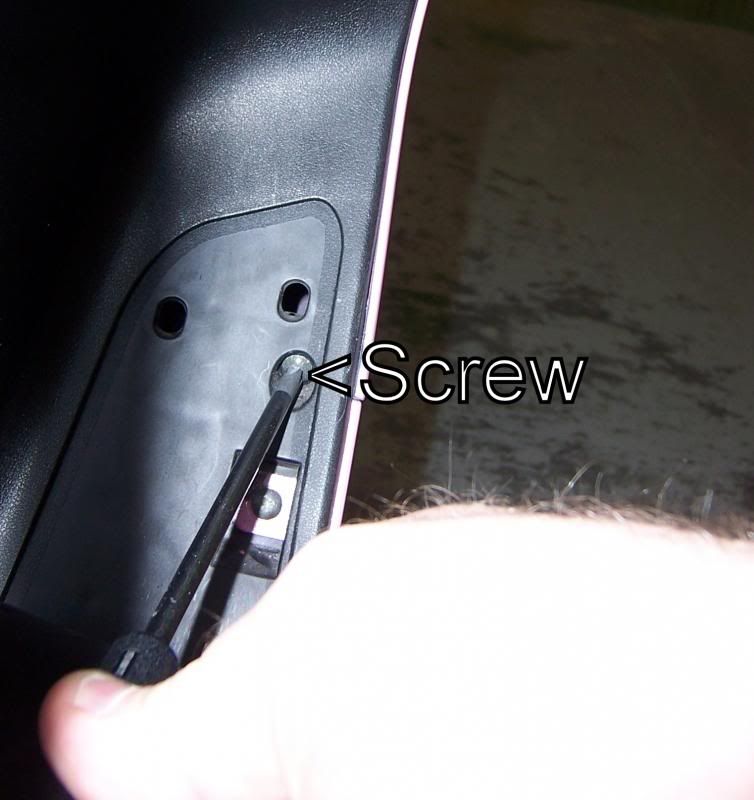
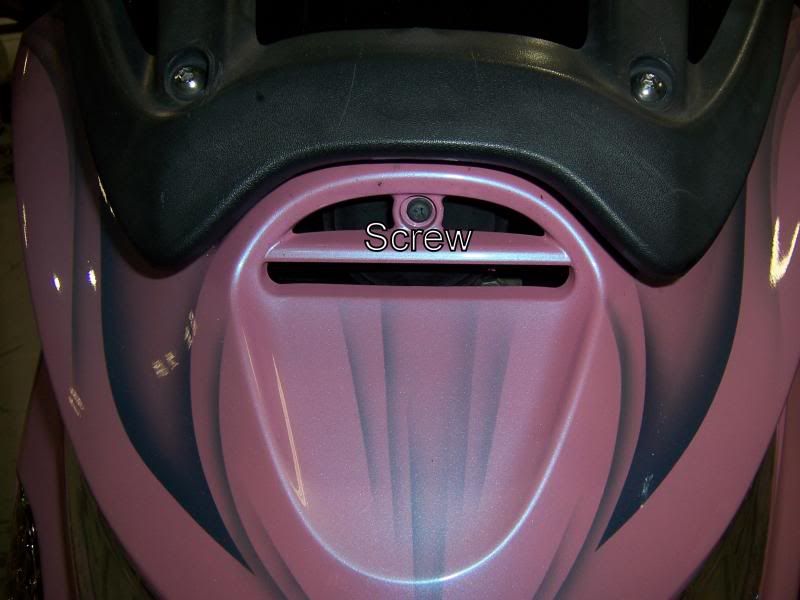


Be careful with the screws. I did brake one of the plastic threaded holes while tightening it too much. So use caution.

Now unplug the harness and then take your headlamp assembly to a large bench to work from. So here is the back side of the faring looking at the rear of the headlamp assembly.

Here I have installed the HID bulb already but you get the idea.
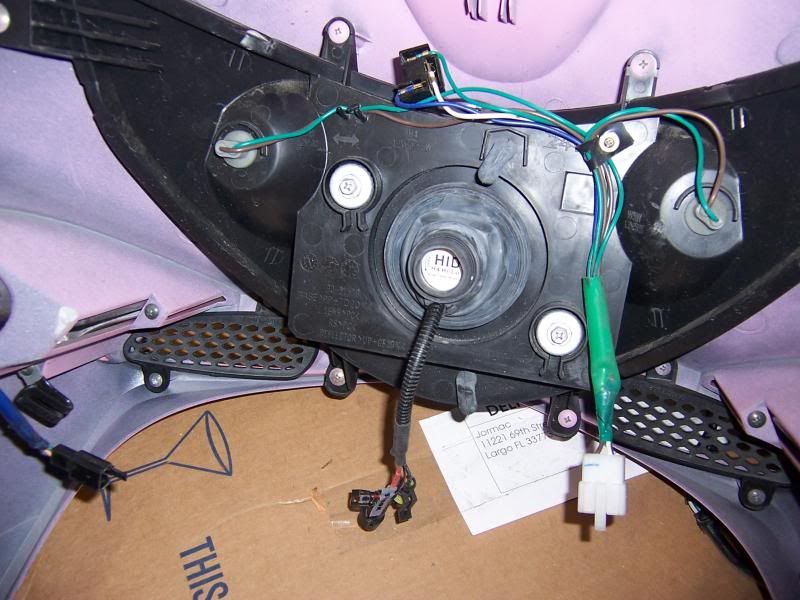


Here are the new and old bulbs going in and the next photo is of the wire harness that comes with the HID bulb. The bulb fits like a glove.
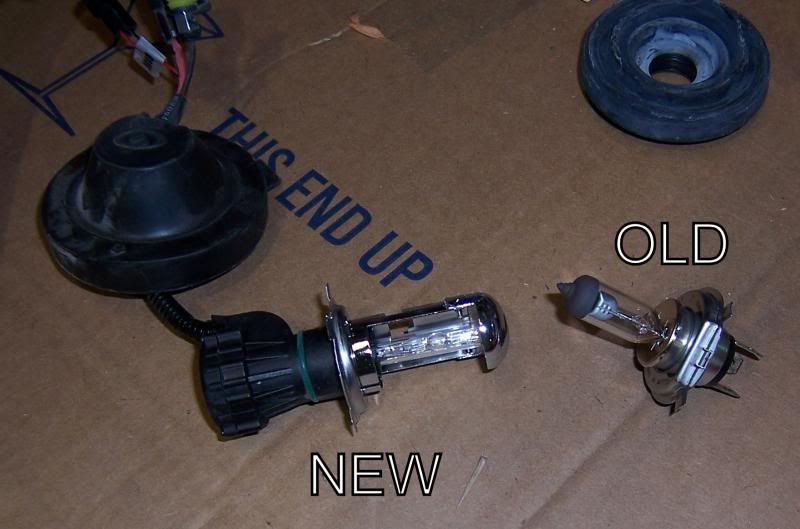
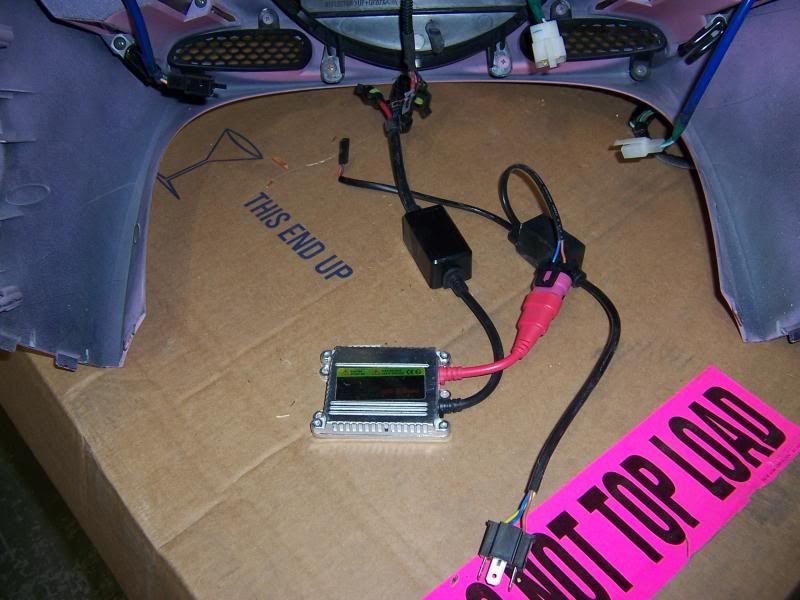


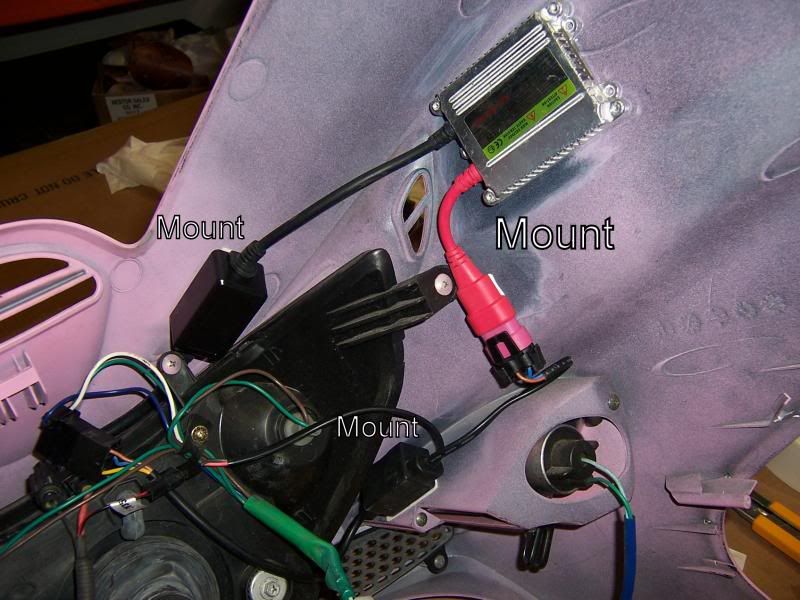
This is how I laid out the harness in the faring. I had to try 3 different times to get it right. The sub frame parts on the bike kept on getting in the way so this is where everything ended up.


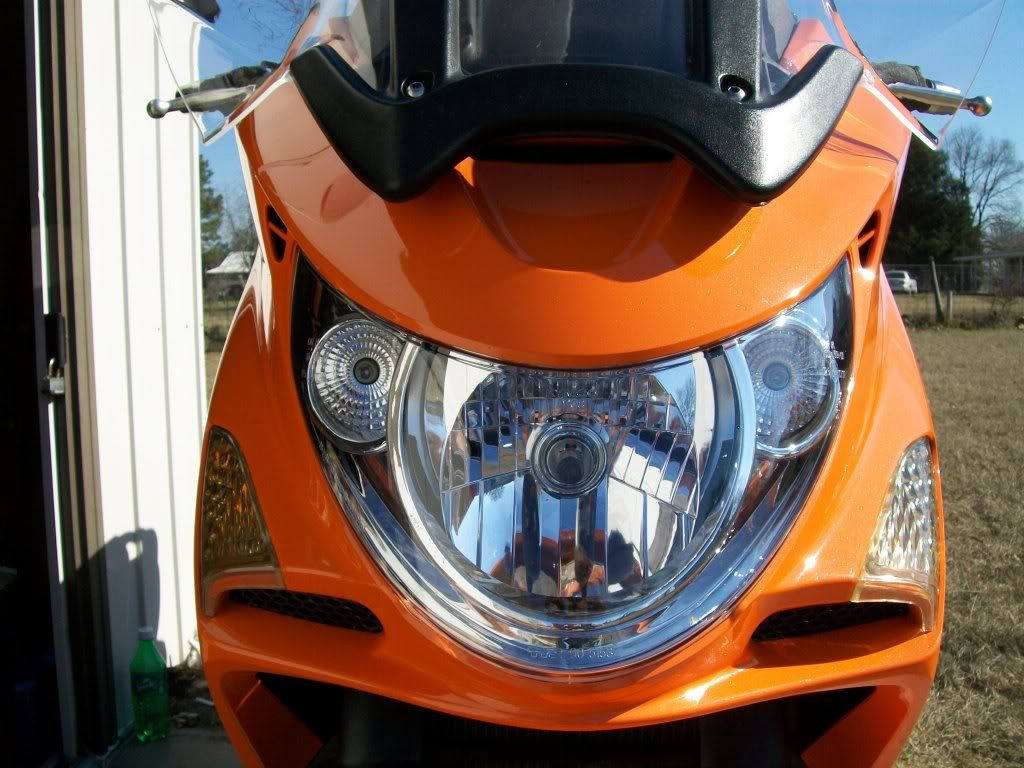
Here is the front view once reassembled.
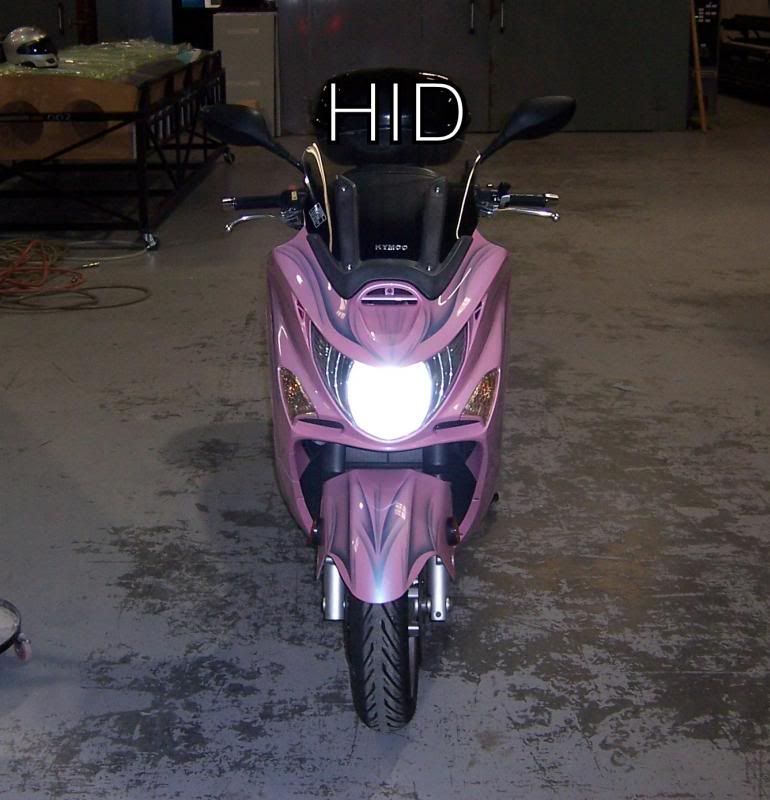


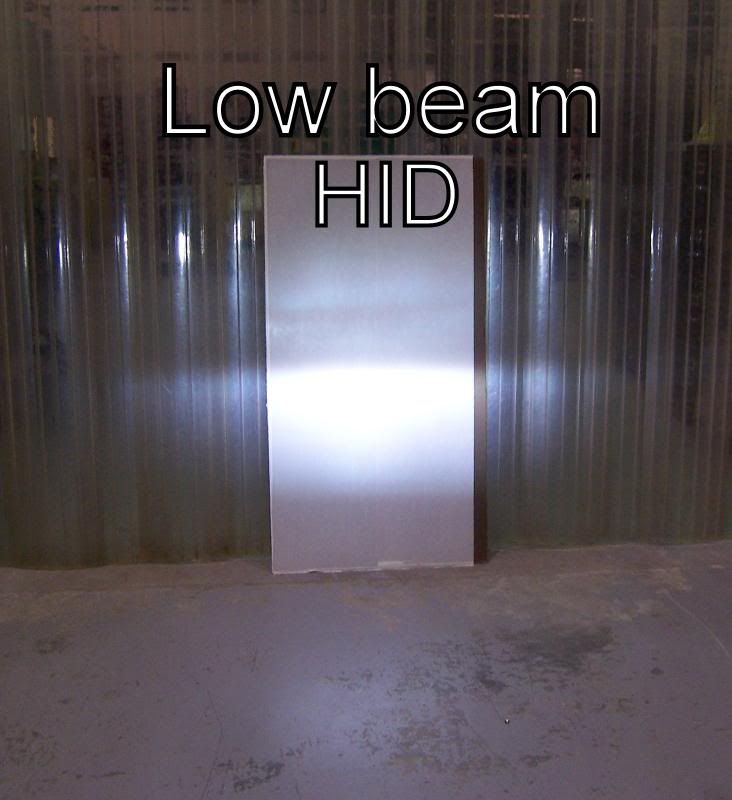
Now if you look here you will see the beam from old first then the beam from new.
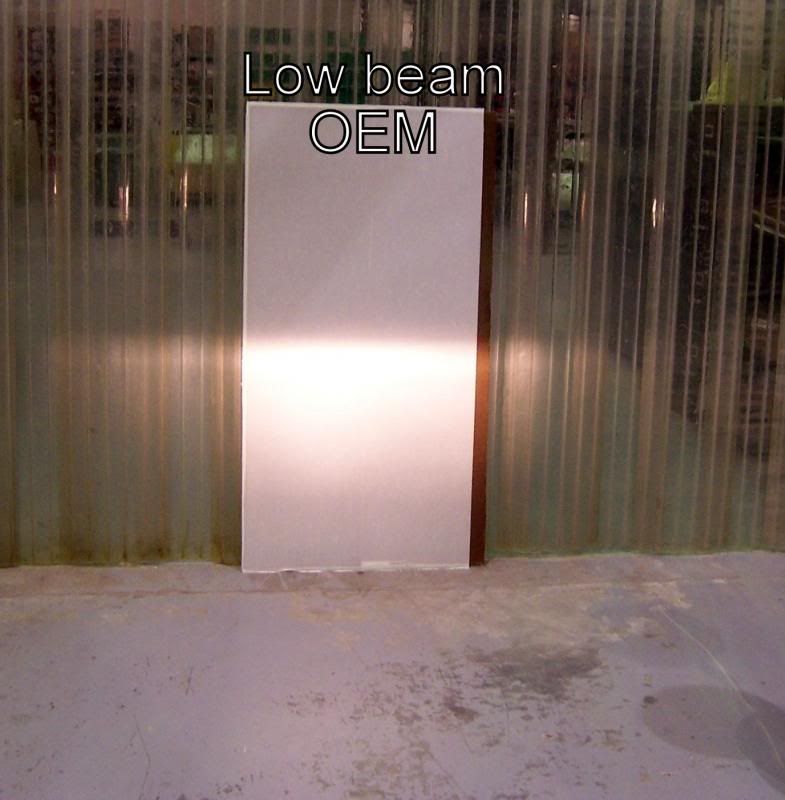


These photos were take about 45 minutes apart inside my shop at about 11am and 11:45am. Bright and sunny outside here in Florida and no lights on in the shop. all ambient lighting is from skylights.

Here is the front view side by side.


Here is a link to the videos I shot both are less than 2 minutes. this is really a very easy install and the difference will be huge. I will post photos and videos during the night of the finished product.

! No longer available

! No longer available

Forgive all the background noise I was running the autoclave during all this and it is noisy even more so with the heaters on.

Here is the euro style headlamp housing. I plan on changing to this headlamp when I get a good price on one.


This is not my image. I am using it only to show the euro style headlamp housing.

In any event have fun and do this upgrade to your bike. Any questions don't hesitate to ask.


CROSSBOLT

  • Hero Member
  • *****
  • Posts: 7764
  • West Tennessee, USA
    • View Profile
Re: HID Upgrade to Xciting 500
« Reply #1 on: April 18, 2017, 04:42:29 PM »
Good presentation! Having great fun watching all the battle between HID and LED. Have not decided on anything yet.

Karl
Karl

Three motorcycles 1960-1977 (restored a 1955 BSA)
Agility 50
Yager 200i
Downtown 300i
Navy tech, Ships Engineer, pilot and aircraft mechanic

RURC

  • Jr. Member
  • **
  • Posts: 53
    • View Profile
Re: HID Upgrade to Xciting 500
« Reply #2 on: April 18, 2017, 04:54:14 PM »
Good presentation! Having great fun watching all the battle between HID and LED. Have not decided on anything yet.

Karl

Thank you for the kind words.

I have played with both and will continue to work with the LED's. The issue is for these retro fits LED's are not giving a smooth halo of light output. No matter what I have tried they have hot spots. The HID is just like the incandescent bulb in the fact that it emits a full ring of illumination that is smooth. For my sons Fiero I hand made housings using frenzil lenses with a straight parabolic reflector. Those work great. Better than any HID I have seen. But I have 200 or so hours in them. I am working on patenting the design otherwise I would show them to you.

My next post will be on changing all the other lights to LED's.

MJR

  • Hero Member
  • *****
  • Posts: 1141
    • View Profile
Re: HID Upgrade to Xciting 500
« Reply #3 on: April 18, 2017, 05:03:48 PM »


Here are the new and old bulbs going in and the next photo is of the wire harness that comes with the HID bulb. The bulb fits like a glove.


I'm a little puzzled with cutting a hole in the boot (the one that goes around the bulb not the cover boot) to run wires. Most of those bulbs are two piece and you remove the bulb from the adapter (twist lock), then adapter goes into the headlamp housing first, then you put the boot back on around the adapter, and finally twist lock the bulb/wires back in. I can see what appears to be a green seal between the bulb/wiring part and the adapter. Nice having whiter light. I bought a HID years ago for one of my Burgmans but haven't put them in yet, wondering about LED now.

Interesting paint makes me think of Easter that just passed, nice.
« Last Edit: April 18, 2017, 05:05:40 PM by MJR »
'03 Clipper Yellow Honda Reflex
'03 Coast Cyan Atlantic 500
'14 White MyRoad 700i
'09 Mirage White Burgman 650
'06 Oort Gray Burgman 650 project
'05 Sonic Silver Burgman 650 project
'03 Space Blue Burgman 650, rebuilt/upgraded CVT w/Polish adapter
'03 Space Blue Burgman 650 parts bike

RURC

  • Jr. Member
  • **
  • Posts: 53
    • View Profile
Re: HID Upgrade to Xciting 500
« Reply #4 on: April 18, 2017, 06:08:03 PM »
I'm a little puzzled with cutting a hole in the boot (the one that goes around the bulb not the cover boot) to run wires. Most of those bulbs are two piece and you remove the bulb from the adapter (twist lock), then adapter goes into the headlamp housing first, then you put the boot back on around the adapter, and finally twist lock the bulb/wires back in. I can see what appears to be a green seal between the bulb/wiring part and the adapter. Nice having whiter light. I bought a HID years ago for one of my Burgmans but haven't put them in yet, wondering about LED now.

Interesting paint makes me think of Easter that just passed, nice.

This is really a simple explanation.
The boot that came with the HID did not fit the factory housing very well so I opted to use the OEM seal. Seeing that the OEM seal fit around the HID bulb base so good I decided that putting a small hole in the boot made more since then trying to run the wires out the OEM opening. I did this upgrade over a year ago and have not had a single issue with the lighting system.

This bulb comes apart like you state but this lay out worked better for this set up then doing it the other way. It may be different with another bulb.

I had completely forgot about that when I wrote this up and neglected to mention it.
« Last Edit: April 18, 2017, 06:13:50 PM by RURC »

An Error Has Occurred!

Call to undefined function split()