I guess I can't take pictures anymore cause its done. However, here's a step by step instruction:
Things you will need:
1. A soldering iron and soldering lead.
2. Plier cutters
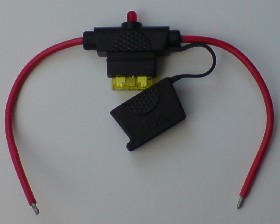
3. This is another alternative ATC blade fuse box or fuse holder
This is just to show you but I will not recommend this because the wire connections on these are using screws. Screws loosen, and a loose connection causes overheating and eventually a melted holder or fire.

Get 3 of these ... These are more weather proof.

4. You will need heat shrink tubes. Get the ones that will fit the wires just fine

Heat shrink tubes will be used to cover the soldered/connected bare wires like in this example
below.

5. Don't forget to buy ATC fuses with same rating as your original glass fuses.
Procedure:
DISCONNECT AND REMOVE THE BATTERY...
1. Cut the wires of the original glass fuse just near the tip of the fuse holder. This way you have a longer wire left to work on. Do this one fuse holder at a time.
2. Strip/splice the wire. Both ends.
3. Strip/splice the wire of the fuse holder..
4. Cut a generous length of a heat shrink tube and and insert wire in the tube.
4. Twist the exposed wires together and solder them good. There's no worry about sparks or polarity here because you're working on the positive side only.
5. Position the heat shrink tube centering the soldered part of the wire at the middle of the tube.
6. Get a butane torch or a butane cigarette lighter and run a flame on the heat shrink tube.
(The tube will just shrink and will not burn)
7. Continue heating the tube until tube is tight on the wire.
8. Repeat procedure on the other 2 fuse holders.
9. Attach the blade fuses.
10. Put battery back...and the hard part... Set the clock...

Hope this helps...
Just keep in mind that you're just replacing the glass fuse holder with a different type. Not really a major conversion.